How to Build a NAS Server in Your Own Home
1/6/20243 min read
Having a reliable and secure storage solution is essential in today's digital age. Whether you have a growing collection of media files, important documents, or a need for centralized backups, a Network Attached Storage (NAS) server can provide the perfect solution. By building your own NAS server, you have full control over your data and can customize it to meet your specific needs. In this guide, we will walk you through the step-by-step process of building a NAS server in your own home.
1. Determine Your Requirements
Before diving into the build process, it's important to determine your specific requirements. Consider factors such as the amount of storage space you need, the number of users accessing the server, and the level of data redundancy you require. These factors will help you choose the appropriate hardware and software for your NAS server.
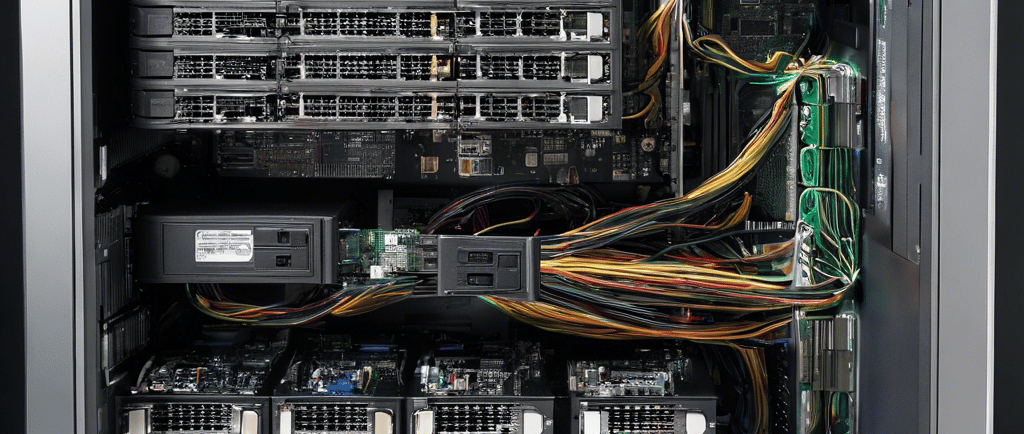
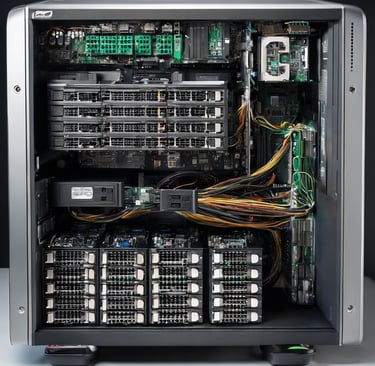
2. Select the Hardware
When it comes to building a NAS server, the hardware you choose plays a crucial role in its performance and reliability. Here are the key components you will need:
Processor (CPU): Look for a CPU with multiple cores and a high clock speed to ensure smooth operation.
Memory (RAM): Aim for at least 4GB of RAM, but consider more if you plan on running resource-intensive applications.
Storage Drives: Opt for reliable hard drives or solid-state drives (SSDs) with sufficient capacity to meet your storage needs. MUST BE A NAS DRIVE!!
Network Interface: Choose a Gigabit Ethernet card for fast and reliable network connectivity.
Power Supply Unit (PSU): Ensure your PSU has enough wattage to support all the components.
Case: Select a case that can accommodate all the hardware components and has good airflow for cooling.
3. Choose the Operating System
There are several operating systems specifically designed for NAS servers, each with its own set of features and user interfaces. Some popular options include:
FreeNAS: An open-source NAS operating system known for its stability and extensive feature set.
OpenMediaVault: Another open-source option that offers a user-friendly web interface and supports a wide range of plugins.
Unraid: A commercial NAS operating system that provides data protection and supports virtualization.
Research each operating system to find the one that best suits your needs and preferences.
4. Assemble the Hardware
Once you have all the necessary hardware components and have chosen your operating system, it's time to assemble your NAS server. Follow these general steps:
Install the CPU, RAM, and storage drives onto the motherboard.
Connect the power supply, network interface, and any additional peripherals.
Place the motherboard and components into the case and secure them.
Connect all the necessary cables, including power, data, and network cables.
Double-check all connections and ensure everything is securely in place.
5. Configure the NAS Software
Once your hardware is assembled, power on your NAS server and follow the instructions provided by your chosen operating system to configure the software. This typically involves setting up storage pools, creating user accounts, and configuring network settings. Refer to the documentation or online tutorials for detailed instructions specific to your chosen operating system.
6. Set Up Remote Access and Security
If you want to access your NAS server remotely or share files with others securely, you will need to set up remote access and implement security measures. This may include configuring port forwarding on your router, setting up a Virtual Private Network (VPN), and enabling encryption for your data. Consult the documentation of your operating system and router for guidance on these steps.
7. Test and Optimize Performance
After completing the initial setup, it's crucial to test the performance of your NAS server and make any necessary optimizations. Run speed tests to ensure your network connection is performing as expected. Monitor the temperature of your hardware components and adjust the cooling if needed. Consider implementing RAID (Redundant Array of Independent Disks) for data redundancy and improved performance.
8. Regular Maintenance and Backups
Once your NAS server is up and running, it's important to perform regular maintenance tasks to keep it running smoothly. This includes updating the operating system and any installed applications, monitoring the health of your storage drives, and performing regular backups of your data. Set up automated backup schedules to ensure your data is protected.
Building a NAS server in your own home may seem daunting at first, but with the right hardware, software, and guidance, it can be a rewarding and cost-effective solution. By following these steps, you can create a reliable and secure storage system that meets your specific needs and provides peace of mind for your valuable data.